Installing a New Ceiling Medallion
Introduction
Enhancing your home’s aesthetic appeal often involves attention to detail. One often-overlooked yet impactful element is the ceiling medallion. In this guide, we’ll explore the step-by-step process of installing a new ceiling medallion, adding a touch of elegance to your living space.
Tools and Materials Needed
Before embarking on the installation journey, gather the necessary tools and materials:
- Ceiling medallion
- Adhesive
- Screws
- Screwdriver
- Measuring tape
- Pencil
- Level
Choosing the Right Ceiling Medallion
Select a ceiling medallion that complements your room’s style and size. Consider the medallion’s diameter and design, ensuring it harmonizes with your existing decor.
Safety Measures
Safety is paramount. Ensure you have a stable ladder and, if needed, assistance from someone to hold the ladder steady during installation. If the medallion is heavy, use appropriate anchors and screws.
Preparation Before Installation
- Turn Off Power: If installing the medallion around a light fixture, turn off the power to avoid any electrical hazards.
- Clean the Ceiling: Ensure the ceiling surface is clean and free of dust or debris for better adhesion.
Measuring and Marking
- Locate the Center: Find the center of the ceiling using a measuring tape.
- Mark the Position: Use a pencil to mark the center and the desired position for the medallion.
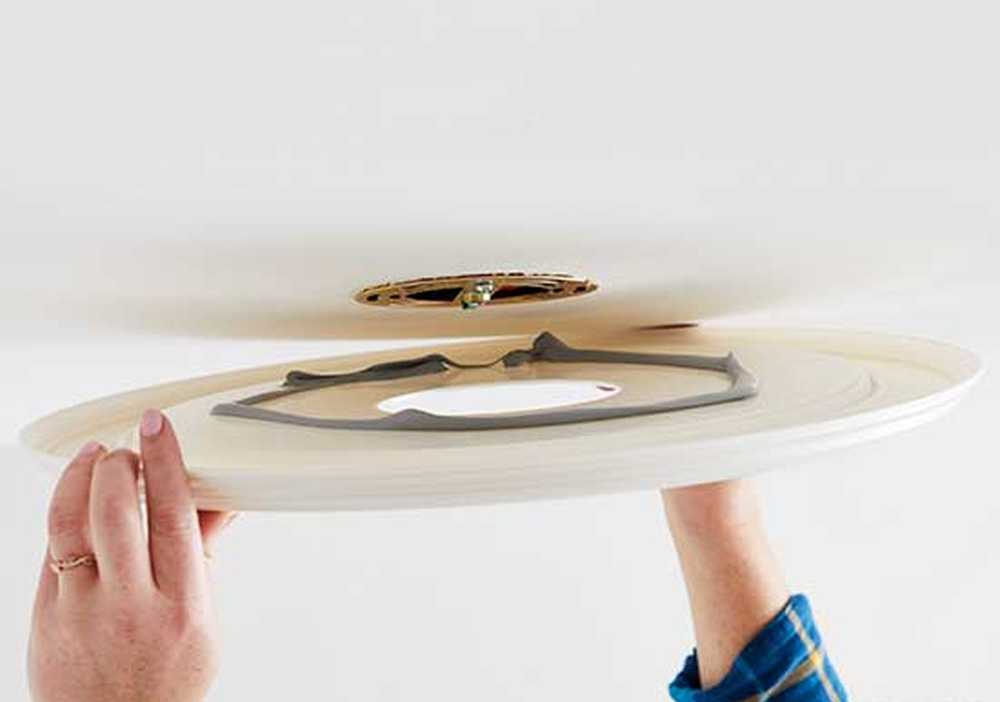
Attaching the Ceiling Medallion
- Apply Adhesive: Using a suitable adhesive, apply a generous amount to the back of the medallion.
- Position the Medallion: Align the medallion with the marked position and press it firmly against the ceiling.
- Secure with Screws: For added stability, secure the medallion in place with screws, using a screwdriver.
Finishing Touches
- Fill Gaps: If there are gaps between the medallion and ceiling, fill them with caulk for a seamless look.
- Paint if Necessary: If the medallion is not pre-finished, paint it to match the ceiling color.
Common Mistakes to Avoid
- Uneven Placement: Ensure the medallion is centered for a balanced appearance.
- Insufficient Adhesive: Use enough adhesive to prevent the medallion from sagging over time.
Maintenance and Cleaning
Regularly dust the ceiling medallion to maintain its pristine appearance. If necessary, wipe it with a damp cloth.
Conclusion
Installing a ceiling medallion is a rewarding DIY project that can transform the look of any room. With careful planning and attention to detail, you can elevate your home’s decor effortlessly.
Frequently Asked Questions (FAQs)
- Can I install a ceiling medallion by myself, or do I need professional help? Most ceiling medallions are DIY-friendly, but if you’re unsure, consult a professional for guidance.
- Do ceiling medallions only work with chandeliers, or can they be used with other light fixtures? Ceiling medallions can enhance the look of various light fixtures, including ceiling fans and pendant lights.
- What’s the ideal size of a ceiling medallion for my room? The size depends on the room’s dimensions. Measure the space and choose a medallion that complements it.
- Can I remove a ceiling medallion without damaging the ceiling? With care and the right tools, you can remove a medallion without causing significant damage.
- Are there alternative ways to secure a ceiling medallion if I can’t use screws? Some medallions come with adhesive backing for easy installation without screws.
References: