Guinea Pig Drawing Tutorial
Introduction
There are numerous lovable pets that you can get, from mice to hares to charming doggies! Quite possibly of the cutest little companion that you can have, notwithstanding, is the guinea pig. These fuzzy little rodents come in various varieties and types, and in light of the fact that they are so unmistakable looking many individuals might want to figure out how to draw a guinea pig. Learn this tutorials and always visit the more drawing tutorials like Princess Luna Drawing for kids.
On the off chance that you might want to draw a guinea pig buddy yourself, continue to peruse this manual for perceive how you can make it happen! Our bit by bit guide on the most proficient method to draw a guinea pig will show you how simple it tends to be!
Stage 1 – guinea pig drawing
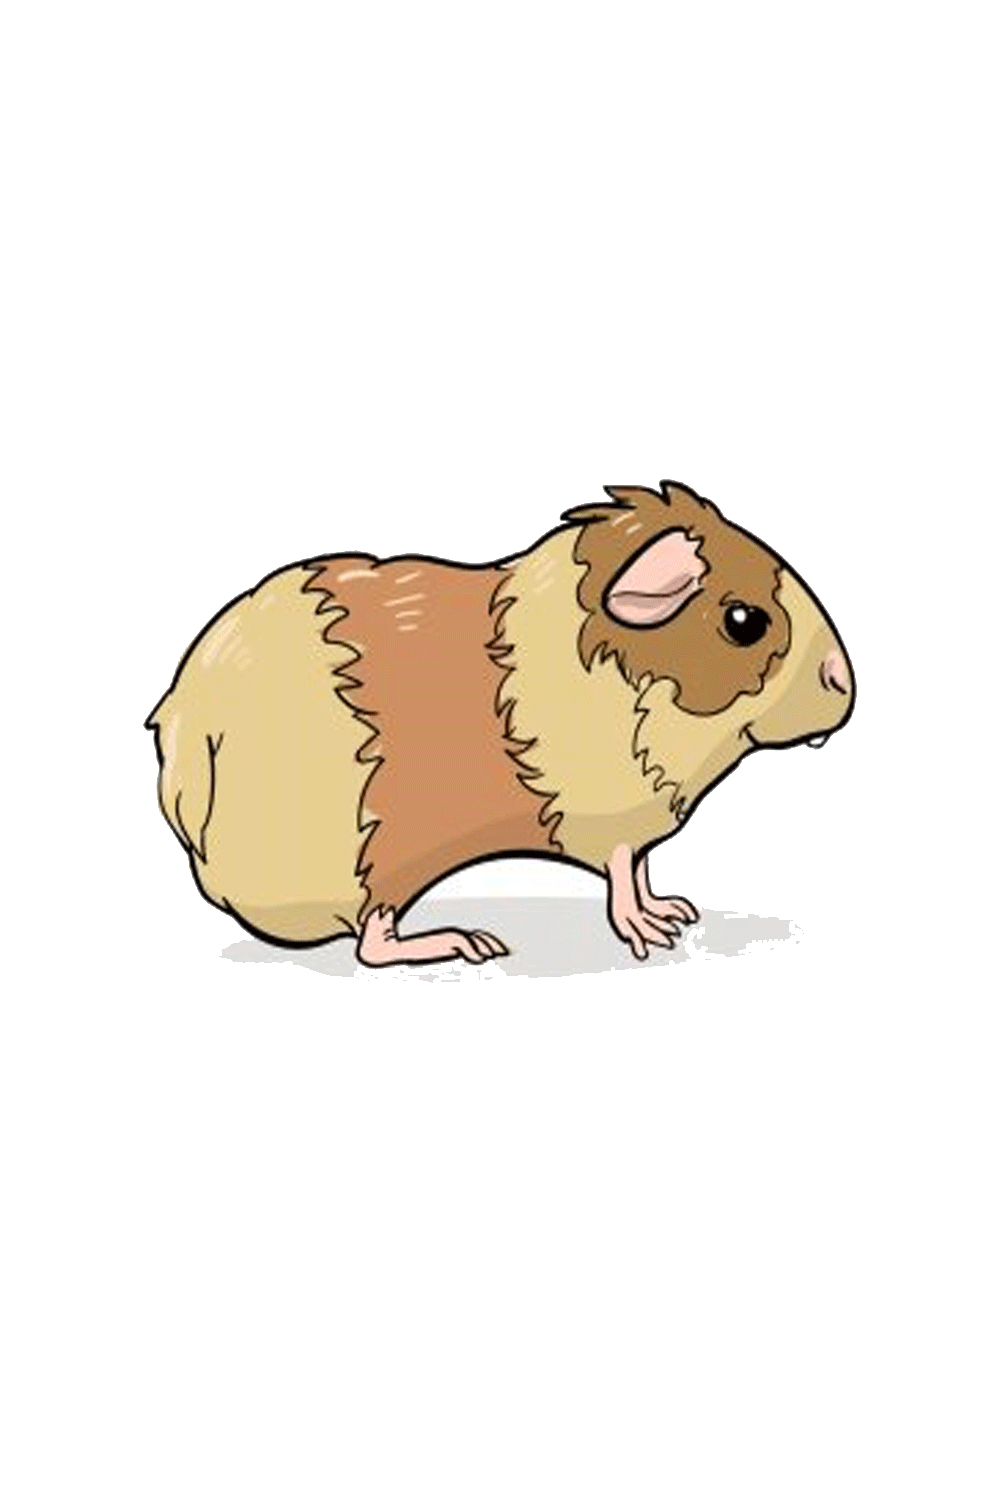
To start this aide on the most proficient method to draw a guinea pig, we will be beginning with the body and set out frame toward the guinea pig. The guinea pig will confront the right-hand side, and its rear will be drawn with an adjusted, rough line. The ruggedness of the line will be utilized to give the presence of fur. It will then, at that point, have a short back prior to moving into the head frame.
There will be all the more sharp lines on top of the head to show hair, and afterward it will go into the face at the front. As you can find in the reference picture, the face is somewhat more adjusted and less barbed in the linework, as it won’t be as shaggy there. When you have the face and body frame done, you’re prepared for stage 2!
Stage 2 – Draw the legs and paunch of the guinea pig
We will add a legs and a paunch to your guinea pig attracting this following stage! The back legs will be exceptionally deficiency down from the body, however will have long feet on the floor. You can draw a little, barbed line at the actual top of the leg to propose fur there. The midsection will then be drawn with a line that bends internal on the guinea pig. The front legs will be somewhat longer and more slender than the back ones, and the feet on these ones will likewise be a piece more modest.
Stage 3 – Presently, we will add an eye, ear and tail
In this step of our aide on the most proficient method to draw a guinea pig, we will add a few components to the inside of the body frame. In the first place, you can draw an eye for your guinea pig. This will be drawn as a filled dark circle with a more modest white circle within it to recommend shining in the eye.
Then, somewhat above and behind the eye you can draw an ear. The ear will be generally enormous and will flounder down. You can draw it with a mix of straight and bended lines, as displayed in the reference picture. At long last, you can draw a thick tail right at the rear of the guinea pig. When you have these components, you’re on to stage 4!
Stage 4 – Add a facial subtleties to your guinea pig in this step
Your guinea pig attracting is truly beginning to come to fruition now! A guinea pig can have loads of particular fur examples, and we will begin to attract the example for this one this step. These lines ought to be thrilling and spiked like different lines you’ve utilized for fur in this aide. The main example will descend from the highest point of the head and around the eye. Then, at that point, a different line will descend off that one and under the mouth. Concerning the mouth, you can utilize a bended line to give a smiley mouth to your guinea pig drawing!
Stage 5 – Presently, you can include the last subtleties to your guinea pig drawing
We have only a couple of additional subtleties to include this step of our aide on the most proficient method to draw a guinea pig! In this step, you can add more shaggy example subtleties like the ones you drew for the face in the past step. You can add two of these lines to the body to polish off the enumerating of your guinea pig!
Before you continue on, you could likewise add whatever other tomfoolery subtleties that you would like! It very well may be good to draw a foundation for your guinea pig, and you could draw a few embellishments like a food bowl or a couple toys. How might you polish off this picture prior to continuing on toward the last step?
Stage 6 – Polish off your guinea pig drawing with some tone
Since you have completed your guinea pig drawing. You can rejuvenate it for certain lovely tones! A guinea pig can arrive in a wide range of varieties, so you have a ton of choices available to you while shading in. In the event that you have at any point possessed a guinea pig, perhaps you could variety this one to seem as though it!
Whenever you have settled on the tones that you will utilize, you can likewise mess with various craftsmanship mediums. Assuming you need your guinea pig looking splendid and lively, you could utilize mediums like acrylic paints and shaded pens to make the varieties pop! In the event that you would like a more muffled, exemplary picture, you could utilize something like watercolors or hued pencils for that sort of look.
Your Tutorial is Complete.