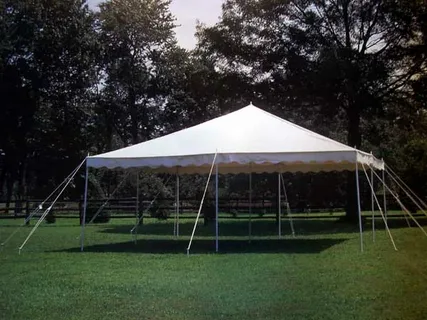
Budget-Friendly Camping Solutions: DIY Tent Poles
Camping enthusiasts often find themselves torn between the allure of the great outdoors and the constraints of a tight budget. While the market offers a plethora of camping gear, one essential item that can put a dent in your wallet is a set of sturdy tent poles. Fear not, for there exists a practical and cost-effective solution – Do-It-Yourself (DIY) tent poles. In this comprehensive guide, we will explore the art of crafting your own tent poles, offering an economical alternative without compromising on quality or reliability.
The Importance of Sturdy Tent Poles
Tent poles are the backbone of any camping shelter, providing the structural support necessary to keep the tent upright and secure. Their stability is crucial in adverse weather conditions, such as strong winds or heavy rain. Investing in high-quality tent poles is a wise decision, but for those seeking a more economical approach, DIY tent poles can be a game-changer.
Materials Needed
Before delving into the step-by-step process, let’s gather the materials required for this DIY project. The beauty of making your own tent poles lies in the simplicity of the materials, many of which can be found at your local hardware store or repurposed from items you already own.
-
Aluminum Tubing: Opt for lightweight and durable aluminum tubing, available in various diameters. This will serve as the main component of your DIY tent poles.
-
Measuring Tools: A tape measure and a marker will help you accurately measure and mark the lengths of tubing you need.
-
Saw: A hacksaw or pipe cutter is essential for cutting the aluminum tubing to the desired lengths.
-
Sandpaper or File: Smooth out any rough edges on the cut tubing to prevent snagging on your tent fabric.
-
End Caps: These will go on the ends of your tent poles to provide a finished look and protect against sharp edges.
-
Shock Cord and Cord Locks: For the adjustable sections of your tent poles, you’ll need shock cord and cord locks to secure the sections in place.
-
Drill and Drill Bits: If your tent requires grommets or attachment points, a drill will be necessary for creating holes in the tubing.
Step-by-Step Guide
1. Measure and Mark
Using your tape measure and marker, measure and mark the lengths you need for your tent poles. Ensure accuracy in your measurements, as precision is key to a successful DIY project.
2. Cut the Tubing
Carefully cut the aluminum tubing to the lengths you marked using a hacksaw or pipe cutter. Take your time and use proper safety precautions to avoid accidents.
3. Smooth Edges
After cutting, use sandpaper or a file to smooth out any rough edges on the tubing. This step is crucial to prevent damage to your tent fabric.
4. Drill Holes (If Necessary)
If your tent requires grommets or attachment points, use a drill to create holes in the tubing. Be strategic in their placement to ensure proper tension and stability.
5. Attach End Caps
Secure end caps to each end of the tubing. This not only provides a polished appearance but also protects against sharp edges that could damage your tent.
6. Shock Cord Assembly
For tents that require adjustable poles, cut the shock cord to the appropriate length and thread it through the tubing. Attach cord locks to both ends to allow for easy adjustment and tensioning.
7. Assemble Your Tent Poles
Your DIY tent poles are now ready for assembly. Follow the instructions provided with your tent to ensure proper setup and tensioning.
Benefits of DIY Tent Poles
1. Cost-Effective
The most apparent advantage of crafting your own tent poles is the significant cost savings. Purchasing aluminum tubing and the necessary accessories is notably more economical than buying pre-made tent poles.
2. Customization
DIY tent poles allow for customization to suit your specific camping needs. You can tailor the length, thickness, and features of the poles based on the requirements of your tent and the environments you’ll be camping in.
3. Repairability
In the unfortunate event of a mishap, repairing DIY tent poles is often simpler than fixing commercially available poles. Replacement parts are readily available, and the modular design of DIY poles makes them easy to disassemble and repair on the go.
4. Educational Experience
Embarking on a DIY project provides a valuable learning experience. Assembling your tent poles not only enhances your camping skills but also fosters a deeper understanding of the gear you rely on during outdoor adventures.
Tips for Success
-
Thorough Research: Before starting your DIY project, research the specific requirements of your tent and the environmental conditions you may encounter. This knowledge will guide your material choices and construction process.
-
Quality Materials: While aiming for cost-effectiveness, do not compromise on the quality of materials. Opt for durable aluminum tubing and secure fasteners to ensure the longevity and reliability of your DIY tent poles.
-
Test and Adjust: Before heading into the wilderness, set up your tent with the DIY poles in a controlled environment. This allows you to identify any issues and make necessary adjustments before facing challenging conditions.
-
Carry Spare Parts: When venturing into the outdoors, it’s always wise to carry spare parts for your DIY tent poles. A broken shock cord or a lost cord lock can be easily replaced if you have extras on hand.
Conclusion
Crafting your own tent poles is a practical and rewarding endeavor for budget-conscious campers. With the right materials, tools, and a bit of patience, you can create reliable and cost-effective tent poles that stand up to the demands of outdoor adventures. By embracing the DIY approach, you not only save money but also gain a deeper connection to your camping gear, fostering a sense of self-reliance and resourcefulness that enhances your overall outdoor experience. So, gear up, get crafting, and elevate your camping adventures with DIY tent poles that combine frugality with functionality.


